Glute Workout at Home: An 8-Week Plan to Build Stronger Glutes Without a Gym
An eight-week glute workout you can do at home with a mat and one pair of dumbbells, including six core exercises, exact sets and reps, weekly progression rules and the loading mistakes that keep most people flat.
Key takeaways
- Glutes respond to load and progression, not repetition count. Three hundred unweighted squats a day will not do what eight hard hip thrusts will.
- You need three movement categories, not twenty exercises: hip extension (bridges, thrusts), hip hinge (Romanian deadlifts) and single-leg work (split squats, step-ups).
- Train glutes two to three times a week on non-consecutive days. They recover quickly, but they still need a day off to adapt.
- Take most sets to within one or two repetitions of failure. That effort threshold matters more than the specific exercise you chose.
- Progress one variable per week: reps, load, range, tempo or a harder variation. Changing everything at once makes it impossible to know what worked.
- Visible change typically takes eight to twelve weeks; measurable strength change shows up in three to four. Judge the programme by the numbers in your log, not the mirror at week two.
- A pair of adjustable dumbbells and a sofa will out-train most machines for this purpose. Bands are useful for warm-ups and finishers, not as your main load.
What your glutes actually do — and why that changes the exercises
People talk about the glutes as though they were one muscle with one job. They are three muscles with at least four jobs, and knowing which is which is the difference between a programme that works and a list of exercises copied off a video.
The three muscles you are training
- Gluteus maximus — the large one, and the primary hip extensor in your body. Its job is to drive your thigh backwards relative to your pelvis and to resist your torso folding forward. It is also the muscle that most obviously changes the shape of your hips when it grows.
- Gluteus medius — sits higher and further to the side. It abducts the hip (moves the leg away from the midline) and, more importantly, stops your pelvis dropping and your thigh collapsing inward every time you stand on one leg. Walking is a series of single-leg stances, so this muscle works all day whether you train it or not.
- Gluteus minimus — underneath the medius, doing a similar stabilising job in a smaller way. You do not train it separately; it comes along with everything else.
The practical consequence is that glute training has two distinct halves. One half is heavy hip extension: bridges, thrusts and hinges, where the maximus produces force through a large range. The other half is single-leg control: split squats, step-ups and lateral work, where the medius keeps your pelvis level while the maximus works on one side at a time. A programme with only the first half builds strength you cannot use. A programme with only the second half never gets heavy enough to change much.
Why the exercise you choose matters less than you think
Electromyography research comparing glute exercises is genuinely interesting and widely misread. Studies do show that hip thrusts produce very high gluteus maximus activation at end-range extension, while squats and deadlifts produce more at the bottom of the movement. What they do not show is that one exercise is therefore mandatory. Muscle activation in a single set is a poor proxy for growth over months. What predicts growth is training the muscle through a decent range, close to failure, often enough, with load that rises over time. The exercises in this plan were chosen because they let you do that at home — not because any one of them is magic.

The equipment you actually need at home
You need three things, and none of them are expensive. A mat or folded blanket for floor work. A sturdy elevated surface — a sofa edge, a firm armchair, a bed frame or a step. And a source of external load you can increase, which in practice means a pair of adjustable dumbbells, a loaded backpack, or a kettlebell.
That last point is where most home setups fail. Resistance bands are excellent for warm-ups, for lateral hip work and for adding a burn at the end of a session, but they have a specific limitation: their resistance is lowest exactly where your glutes are strongest, and a band that is genuinely hard for a hip thrust is usually so tight it becomes uncomfortable across the hips. Use bands for what they are good at. Use dumbbells, or a backpack loaded with books and water bottles, when you need to make hip extension heavier.
The six exercises, step by step
Read the form notes properly before you start loading anything. Every one of these movements has a specific failure mode, and every failure mode moves the work away from your glutes and into your lower back or the front of your thighs.
1. Glute bridge — your baseline hip extension
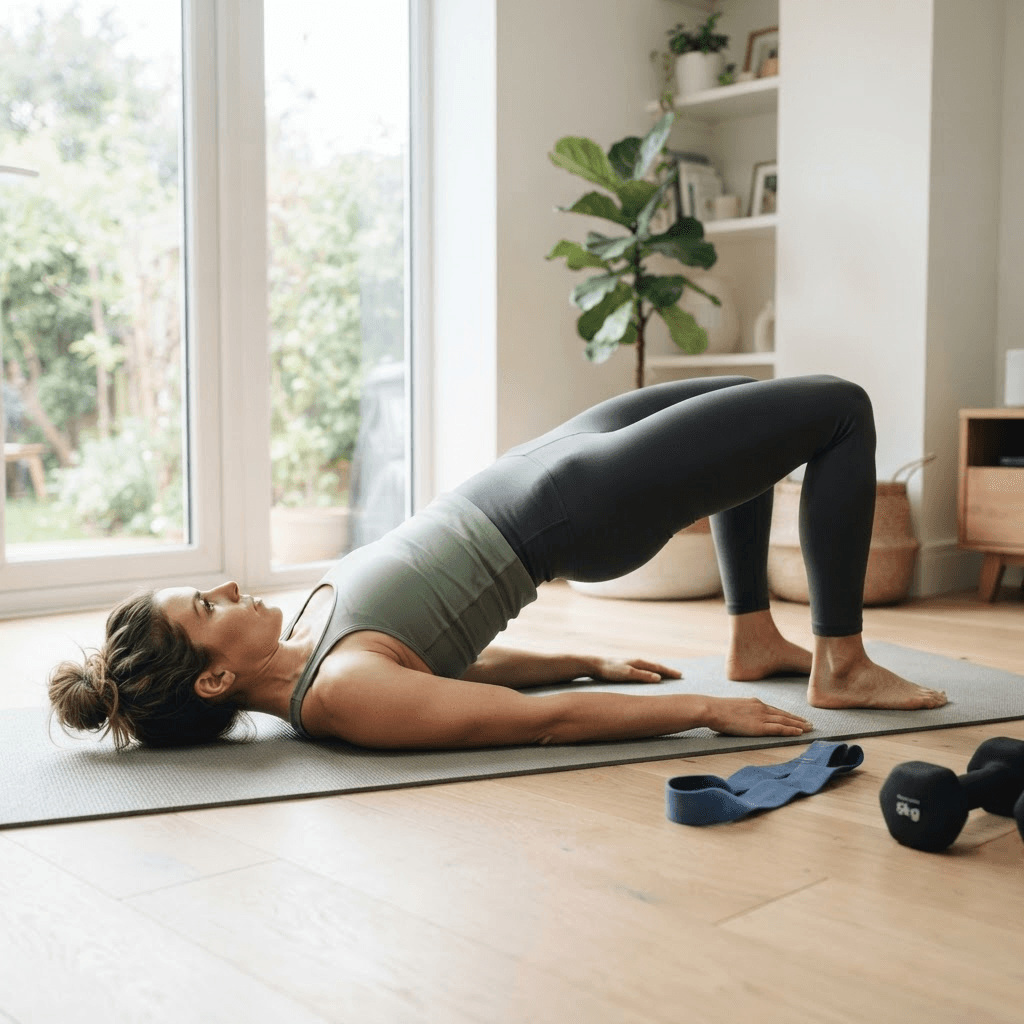
- Lie on your back with your knees bent and heels roughly a hand’s width from your backside. Feet flat, hip-width apart.
- Press your lower back gently towards the floor so your ribs sit down rather than flaring up. This is the position you must keep for the whole set.
- Drive through your heels and squeeze your glutes to lift your hips until your body forms a straight line from knee to hip to shoulder. Do not go higher.
- Hold the top for a full second and confirm you can feel the effort in your glutes rather than your lower back or hamstrings.
- Lower under control over roughly two seconds until your hips are just off the floor, then start the next repetition without resting on the ground.
Form cue that fixes most bridges
If you feel your lower back working, you are almost certainly extending your spine instead of your hips. Tuck your pelvis slightly — imagine pointing your pubic bone towards your chin — before you lift, and stop the movement lower than feels satisfying. A smaller range done with your hips is worth more than a bigger range done with your spine.
2. Dumbbell hip thrust — where the real load goes
This is the same movement as the bridge with your shoulders elevated, which increases the range your hips travel through and makes it far easier to load heavily. It is the primary strength exercise in this plan.
- Sit on the floor with your upper back against the edge of a sofa or firm chair. Your shoulder blades, not your neck, should make contact with the edge.
- Place a dumbbell across your hip crease over a folded towel and hold it with both hands. Set your feet flat, roughly hip-width, far enough forward that your shins are vertical at the top of the movement.
- Tuck your chin slightly and keep your ribs down. Drive your heels into the floor and push your hips up until your torso is level with your thighs.
- Squeeze hard for one second at the top. Your knees, hips and shoulders should form a straight line, and your eyes should be looking forward rather than at the ceiling.
- Lower over two to three seconds until your hips are a few centimetres from the floor, then repeat.

3. Single-leg Romanian deadlift — the hinge
Bridges and thrusts train hip extension with your knees bent, which favours the glutes. The Romanian deadlift trains it with your knees nearly straight, which brings the hamstrings in and loads the glutes in a stretched position. Both are useful, and doing it on one leg turns it into a balance and gluteus medius exercise at the same time.
- Stand on your right leg holding a dumbbell in your left hand. Put the fingertips of your right hand on a wall for balance if you need to — this is not cheating.
- Soften your standing knee slightly and keep it there. It should not bend further as you move.
- Push your hips backwards and let your torso tip forward as one long piece, extending your left leg behind you. Your hips must stay square and level: if your left hip rotates open towards the ceiling, you have gone too far.
- Stop when you feel a firm stretch along the back of your standing thigh, usually with your torso somewhere near parallel to the floor.
- Return by squeezing your standing glute and driving your hips forward until you are upright. Complete all repetitions on one leg before swapping.

4. Rear-foot-elevated split squat — single-leg strength
- Stand about half a metre in front of a low chair, facing away from it, and rest the top of your rear foot on the seat.
- Check your front foot position: at the bottom of the movement, your front shin should be close to vertical and your front knee stacked over your midfoot.
- Lean your torso forward around ten to fifteen degrees. This is deliberate — a slight forward lean shifts work from the quadriceps towards the glutes.
- Lower straight down until your rear knee is a few centimetres from the floor, keeping your front heel planted.
- Drive through your front foot to stand, thinking about pushing the floor away rather than pulling yourself up. Complete all repetitions on one side, then swap.
If your balance is the limiting factor
Do not accept a wobbly set — you cannot load an exercise you cannot control. Lower the rear surface, widen the stance slightly, or hold a doorframe with one hand and a dumbbell in the other. Balance improves quickly with practice, and your glutes get the benefit in the meantime.

5. Banded lateral walk — gluteus medius
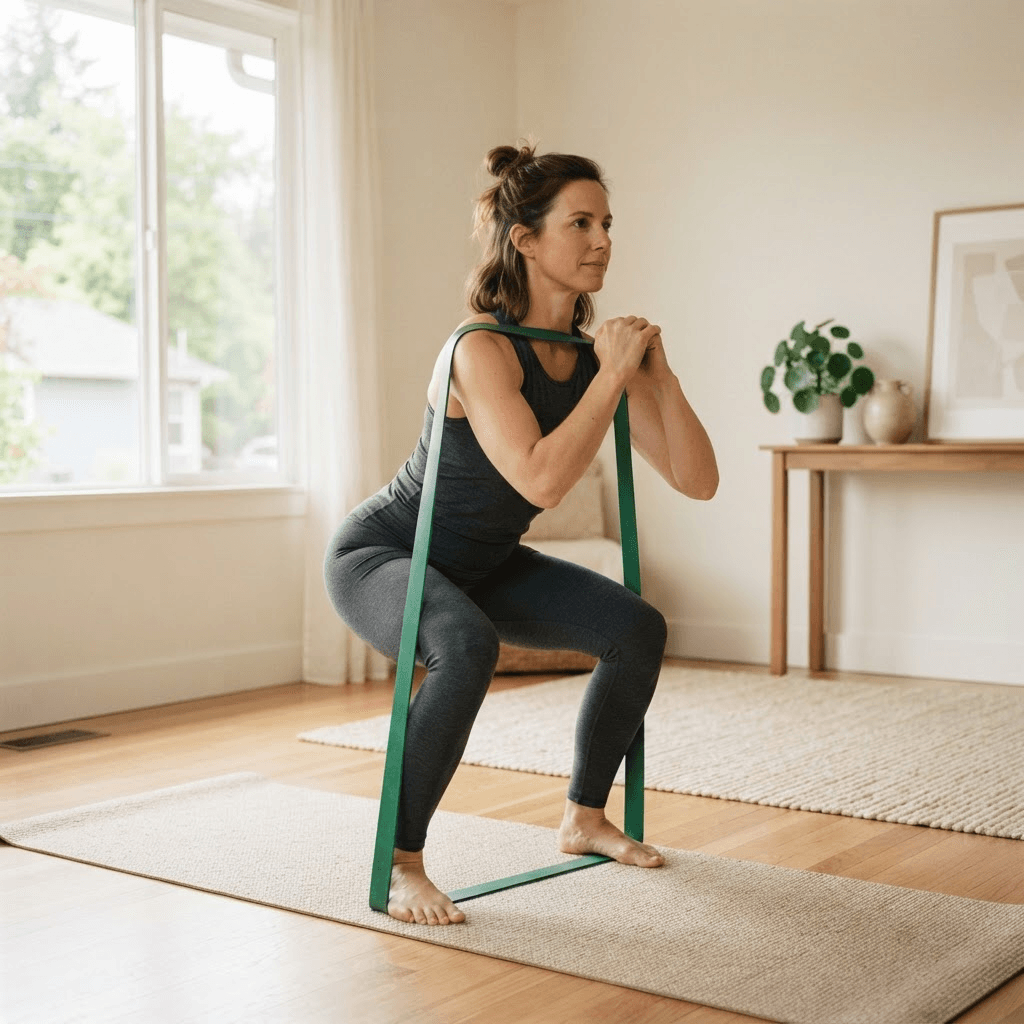
Place a loop band just above your knees, sink into a quarter squat with your torso upright, and step sideways with control for ten to fifteen steps in each direction. Keep tension on the band throughout: the mistake is letting your knees fall inward on the trailing leg between steps. You should feel this distinctly on the outside of the hips, and it should be uncomfortable by the second set. If it is not, the band is too light.

6. Step-up — the pattern you use in real life
Find a step, stair or sturdy box roughly knee height or a little lower. Place your whole foot on it, lean your torso forward slightly, and stand up by pushing through that foot without pushing off the floor with the trailing leg. Lower slowly — three seconds down — and let the trailing foot touch lightly before the next repetition. The temptation is to bounce off the bottom foot; resist it, because that is where most of the training effect lives. Hold dumbbells when bodyweight becomes straightforward.
The eight-week plan
Train glutes twice a week for the first four weeks and three times a week thereafter, always leaving at least one day between sessions. Session A is the heavier hip-extension day; Session B emphasises single-leg work. Warm up first with ten glute bridges, ten bodyweight split squats per side and one set of banded lateral walks — five minutes, no more.
| Weeks | Sessions per week | Session A (hip extension focus) | Session B (single-leg focus) | Effort target |
|---|---|---|---|---|
| 1–2 | 2 | Glute bridge 3×12; dumbbell hip thrust 3×10; banded lateral walk 2×12 each way | Split squat 3×8 each side; single-leg RDL 2×8 each side; step-up 2×10 each side | 3 RIR — learning technique, not testing yourself |
| 3–4 | 2 | Hip thrust 4×10; single-leg glute bridge 3×10 each side; lateral walk 3×12 | Split squat 3×10 each side; single-leg RDL 3×8 each side; step-up 3×10 each side | 2 RIR — add load before adding repetitions |
| 5–6 | 3 | Hip thrust 4×8 heavier; paused bridge 3×10 with 3-second hold; lateral walk 3×15 | Split squat 4×8 each side with dumbbells; single-leg RDL 3×10 each side; step-up 3×8 loaded | 1–2 RIR on final set of each exercise |
| 7–8 | 3 | Hip thrust 4×6–8 heaviest; single-leg hip thrust 3×8 each side; lateral walk 3×15 | Split squat 4×6–8 loaded; single-leg RDL 4×8 each side; step-up 4×8 loaded | 1 RIR — this is the hardest fortnight of the block |
The third weekly session in weeks five to eight should alternate: run Session A twice and Session B once in one week, then reverse it the next. That way neither pattern gets neglected and neither gets hammered three times in seven days.
What "repetitions in reserve" means in practice
RIR is the honest answer to the question "how many more could I have done?" at the moment you stopped. Two RIR means you were confident you had two more good repetitions available. It is a better instruction than a percentage of your one-rep maximum because you do not need to test a maximum at home, and it self-corrects on days when you slept badly. The single most common reason home training produces nothing is that people habitually stop at five or six RIR, which feels like work but is not enough of a stimulus.
How to make it harder each week
Progressive overload is not a philosophy, it is a bookkeeping habit. Write down the load and repetitions for every set. When you hit the top of the prescribed repetition range for all sets with your target RIR still intact, change one variable in the next session. In order of preference:
- Add load. Two to five kilograms on a hip thrust, one to two kilograms on single-leg work. This is the most effective lever and the one people skip.
- Add repetitions, up to the top of the range given in the table.
- Add range — a higher rear foot on split squats, a deeper hinge on Romanian deadlifts, provided your form holds.
- Slow the lowering phase to three or four seconds, which increases tension without any new equipment.
- Move to a harder variation: two legs to one leg, bridge to thrust, bodyweight step-up to loaded.
Change one thing at a time. If you add weight, slow the tempo and add a set in the same week, and the session goes badly, you have learned nothing about which change was too much. Coaches are not being fussy about this; it is the only way the log stays useful.
The seven mistakes that keep home glute training flat
- Never getting heavier. If your week-eight hip thrust looks like your week-one hip thrust, you completed an activity rather than a programme. This is the mistake behind almost every "why are my glutes not growing" question I receive.
- Arching the lower back instead of extending the hips. It produces a taller bridge and a sore back. Keep the ribs down, tuck the pelvis slightly and stop the range where your glutes are still doing the work.
- Training glutes daily. Muscle is built during recovery. Two or three quality sessions a week beats seven mediocre ones, and daily loading of the same tissue is how tendon irritation starts.
- Chasing the burn. Burning is a metabolic sensation, not a measure of stimulus. High-repetition band work burns intensely and builds relatively little; a heavy set of eight burns much less and builds more.
- Skipping single-leg work because it is humbling. Split squats and single-leg hinges expose side-to-side differences and poor pelvic control. That discomfort is the reason to do them.
- Only doing squats. Squats are a fine exercise, but they load the glutes primarily in the bottom position and are limited at home by how much weight you can safely hold. Hip extension work fills the gap that bodyweight squats leave.
- Judging progress in the mirror at week three. Strength changes appear in three to four weeks, mostly through neural adaptation. Visible shape change usually needs eight to twelve weeks of progressive loading, and the mirror is a badly calibrated instrument at the best of times.
Recovery, protein and the boring parts that decide the outcome
You cannot build tissue you do not feed. Current sports nutrition consensus puts protein intake for people training to build muscle somewhere around 1.6 grams per kilogram of bodyweight per day, spread across the day rather than concentrated in one meal. For a 70kg person that is roughly 112 grams — achievable with a protein source at each meal and no supplements required. Below that, hard training tends to produce fatigue rather than adaptation.
Sleep matters more than any of the recovery products marketed at you. If you are training three times a week, progressing load and sleeping five hours, the ceiling on your results is set by the sleep, not the programme. And soreness is not a scoreboard: it reflects novelty and eccentric loading, which is why week one hurts and week six often does not even though week six is far more productive.
When to take an easy week
If two consecutive sessions feel harder at the same load, your sleep is poor and your enthusiasm has vanished, cut the volume in half for a week and keep the load the same. Almost everyone comes back stronger. Pushing through that state is how eight-week plans become abandoned four-week plans.
How to measure progress properly
Track three things and ignore everything else. First, your working load and repetitions for the hip thrust and the split squat — these are your strength markers, and they should both climb across eight weeks. Second, a hip circumference measurement taken at the widest point, once every four weeks, in the morning, by the same person with the same tape. Third, one sentence per session about how it felt and whether anything hurt.
What good progress looks like at week eight: hip thrust load up by thirty to fifty per cent from week one, split squats loaded where they were bodyweight, single-leg work where the weaker side has closed most of the gap, and no persistent joint pain. Scale weight is a poor measure here because you may be adding muscle while losing fat, and a tape measure and a training log will tell you far more than the number on the floor of your bathroom.
When to stop and speak to a professional
Muscle soreness in the belly of the glute or hamstring for a day or two after training is normal. The following are not, and none of them should be trained through: sharp or pinpoint pain at the sitting bone or the outside of the hip, pain that worsens session after session rather than settling, groin or hip pain that clicks or catches, any pain radiating down the back of the leg with numbness or tingling, or lower-back pain that changes how you walk.
Persistent pain at the sitting bone during hinges and thrusts, in particular, is worth a professional opinion rather than more repetitions — it is a common presentation and it responds well to a modified loading plan and badly to being ignored.
The shape change came later, somewhere around week fourteen, and it came because she kept adding load rather than because she found a better exercise. That is the whole secret of a good glute workout at home, and it is unfashionable precisely because it is so simple: pick a handful of movements you can control, get honestly close to failure, write down what you did, and make it heavier than last week. Everything else is decoration.
Evidence and further reading
These sources underpin the loading, frequency, protein and safety guidance used in this article. All are freely accessible summaries or peer-reviewed research.
- Physical Activity Guidelines for Americans, second edition — muscle-strengthening recommendationsU.S. Department of Health and Human Services
- WHO guidelines on physical activity and sedentary behaviourWorld Health Organization
- Dose-response relationship between weekly resistance training volume and muscle hypertrophyJournal of Sports Sciences
- Effect of repetition duration and proximity to failure on muscular adaptationsSports Medicine
- Systematic review and meta-analysis of protein supplementation on resistance-training-induced gains in muscle mass and strengthBritish Journal of Sports Medicine
- Gluteal muscle activation during common lower-extremity strengthening exercisesInternational Journal of Sports Physical Therapy
- ACSM Guidelines for Exercise Testing and Prescription, 11th editionAmerican College of Sports Medicine
Common glute training questions
Can you build glutes at home without any weights?
To a point, yes — especially in the first two months if you are new to training. Single-leg variations are the key, because a single-leg hip thrust or a rear-foot-elevated split squat loads one side with roughly your whole bodyweight. Beyond about three months, progress usually stalls without some form of external load, and that load can be a backpack full of books rather than a gym membership.
How long does it take to see results from a glute workout at home?
Strength changes are usually measurable within three to four weeks, largely because your nervous system gets better at recruiting the muscle. Visible change in shape typically takes eight to twelve weeks of progressive loading, and longer if you are also in a calorie deficit. Track load and repetitions rather than the mirror, because the log improves before the reflection does.
How many times a week should I train glutes?
Two to three sessions per week on non-consecutive days is the sweet spot for most people. That allows enough weekly volume for growth while leaving time to recover between sessions. Training glutes every day is a common mistake: it accumulates fatigue, lowers the quality of each session and increases the chance of tendon irritation.
Why are my glutes not growing even though I train them a lot?
The most likely reason is that the work never gets harder. High-repetition bodyweight and band circuits are usually well within what your hips already tolerate, so there is no reason for your body to adapt. The second most likely reason is stopping sets too far from failure, and the third is not eating enough protein. Fix loading first — it is responsible for most cases.
Are hip thrusts better than squats for glutes?
They are better suited to home training, which is not quite the same thing. Hip thrusts load the glutes strongly at end-range extension and are easy to make heavier with a single dumbbell, while squats load the glutes more in the bottom position but are limited at home by how much weight you can safely hold. The practical answer is to do hip extension work as your main lift and keep squats or split squats alongside it.
Do resistance bands work for glute training?
Bands are excellent for warm-ups, gluteus medius work such as lateral walks, and finishing sets. They are a poor primary tool for hip extension because resistance is lowest where your glutes are strongest, and bands tight enough to challenge a strong hip thrust tend to be uncomfortable across the hips. Use them as a supplement, not as your load.
Why do I feel glute exercises in my lower back or hamstrings instead?
Usually because you are extending your spine rather than your hips, or your feet are placed too far from your body. Tuck your pelvis slightly so your ribs stay down, bring your heels closer, reduce the range you lift through and hold the top position for a full second. If it still lands in your lower back, drop the load and rebuild the pattern with unweighted bridges.
Can I do this plan if I have knee pain?
Bridges and hip thrusts keep force through the knee joint low and are often well tolerated. Split squats and step-ups may not be. Reduce depth, lower the step height, and if pain persists, start with a joint-friendly programme instead and get the knee assessed. Sharp pain, swelling, catching or a knee that gives way needs a clinician, not a modification.
Should I train glutes on the same day as legs?
You already are — every exercise in this plan trains your legs. If you also want dedicated quadriceps or calf work, put it in the same session after your glute work rather than on a separate day, so your hips still get a genuine day off. Two hard lower-body days a week beats four half-hearted ones.
Vitality Editorial Team
Vitality publishes practical fitness guidance based on cited sources and established public-health recommendations.
Medical disclaimer: This article is educational and general in nature. It is not a diagnosis, prescription or personalised training plan. Speak with a qualified healthcare professional before starting a new exercise programme, particularly if you have an existing condition, injury or are pregnant.