Core Strength Workout at Home: A 6-Week Beginner Plan for Abs, Lower Back and Posture
A practical core strength workout you can do at home with no equipment: five foundation exercises, two short sessions a week and a six-week progression that builds abs, lower back endurance and steadier posture without a single sit-up.
Key takeaways
- Your core’s main job is to resist unwanted movement, so anti-extension and anti-rotation drills build more usable strength than repeated crunches.
- Two short sessions a week, each around fifteen minutes, are enough for a beginner to build measurable trunk endurance in six weeks.
- If you cannot breathe normally while holding a position, the exercise is currently too hard — regress it rather than holding your breath.
- Progress by adding time, lengthening leverage or reducing points of contact, and change only one of those variables at a time.
- Core training does not selectively burn belly fat; it improves control, endurance and posture, while fat loss depends on overall energy balance.
We deleted the spreadsheet. He started doing five exercises, twice a week, for about fifteen minutes. None of them involved lifting his shoulders off the floor. Six weeks later he held a side plank for forty seconds a side, up from eleven, and mentioned almost in passing that he had stopped noticing his back at work. This guide is that programme, written out in full: what core strength actually is, the five movements worth learning first, and a six-week progression you can run on a bedroom floor with nothing but a mat and a clock.
What core strength actually means
The word “core” is used loosely enough to be almost meaningless. In practice it describes a group of muscles that surround and manage your trunk: the rectus abdominis down the front, the internal and external obliques wrapping around the sides, the deep transversus abdominis beneath them, the erector spinae and multifidus running along the spine, the diaphragm above and the pelvic floor below. Your hips and glutes contribute so heavily that separating them from the core is more of a filing decision than an anatomical one.
These muscles rarely work in isolation, and their most frequent job is not to create movement. It is to prevent it. When you carry a shopping bag in your right hand, your left-side obliques and lateral trunk muscles work to stop you folding sideways. When you push a heavy door, your abdominal wall stops your ribs flaring and your lower back arching. When you turn to reach into the back seat of a car, the trunk transmits force between your legs and arms without collapsing in the middle. Researchers call this anti-movement work, and it is the honest description of what a core does all day.
This matters for training because a strong core in the useful sense is largely a matter of endurance and control rather than maximal force. Studies of trunk muscle function in people with and without recurrent low back pain have repeatedly pointed toward endurance capacity and coordination as the more meaningful differences, rather than raw abdominal power. That is good news for a home routine: endurance and control respond well to short, frequent, unglamorous practice, and they need no equipment at all.
Why crunches are not the whole answer
A crunch is not a dangerous exercise, and I have no interest in the moral panic that occasionally surrounds it. It is simply a narrow one. It trains repeated spinal flexion under low load, which is a small slice of what the trunk does, and it does so in a position that many people with sensitive backs find provocative. If you already have flexion-intolerant back pain — the kind that objects to sitting slumped or bending to tie shoes — a hundred crunches an evening is a poor opening move.
The second myth worth retiring is spot reduction. Core exercises do not preferentially burn abdominal fat. Fat loss follows sustained energy balance across the whole body, and where you lose it first is largely a matter of genetics, sex and hormones. Visible abdominal muscles are the product of body composition, not of ab-exercise volume. If reducing body fat is your goal, the honest levers are diet, daily activity and consistency — the walking for weight loss guide covers that arithmetic properly. Train your core because you want a trunk that works, and let fat loss be a separate project with its own tools.
Judge a core exercise by whether you can hold your position and keep breathing — not by how much it burns.
Before you begin: setup, breathing and the effort scale

What you need
A firm surface, a mat or folded towel, and a clock with a second hand. Carpet is fine. A rolled towel under the head can make floor-lying exercises more comfortable if your neck is fussy. That is genuinely the whole equipment list. If you have a wall available for the standing variations, you have everything the six weeks require.
Find the brace before you need it
Lie on your back with knees bent and feet flat. Place one hand on your lower ribs and the other flat on your stomach just below the navel. Breathe out slowly and completely, and notice your ribs settling down toward your hips. Now, without holding your breath, gently stiffen the whole abdominal wall as if you were about to be nudged in the stomach by a friend — about twenty per cent of your maximum, not a clenched shield. Keep breathing quietly for five seconds while that stiffness stays on. That is the brace. It should feel like bracing, not like sucking your stomach in.
The breathing test is the single most useful piece of feedback in this whole programme. Every exercise that follows should allow slow, quiet nasal breathing throughout. The moment you find yourself holding your breath, gritting your teeth or gasping at the end of a hold, the exercise has moved beyond your current control and you should regress it. Breath-holding under strain also raises blood pressure sharply, which is a genuine reason for caution if you have cardiovascular concerns.
A two-minute warm-up
March on the spot for sixty seconds. Complete eight slow cat-cow movements on hands and knees, moving through a comfortable range without forcing the ends. Add six glute bridges and six standing side bends. You want warmer tissue and a trunk that has already been asked to move in a few directions. You do not want to arrive at the first exercise already tired.
How hard should this feel?
Use a one-to-ten effort scale. Working holds in this programme should end around a six or seven: you can feel real work in the trunk, your position has not degraded, and you could have held on for perhaps five more seconds with the same quality. A ten — shaking, sagging, breath held — is not a badge. The point at which your position visibly changes is the end of a useful set, and stopping there produces better six-week results than pushing to collapse.
The five foundation core exercises
These five movements cover the four jobs a trunk needs to do: resist being bent backwards, resist being bent sideways, resist being twisted, and produce hip extension without borrowing range from the lower back. Learn them in this order. Each includes a regression to make it easier and a progression to make it harder, so a single list serves you from your first week to your last.
1. Dead bug (anti-extension)

Lie on your back with knees bent over your hips at roughly ninety degrees and arms reaching straight toward the ceiling. Press your lower back gently down so there is no gap under it. Breathe out, then slowly lower your right arm behind your head and straighten your left leg toward the floor, going only as far as you can while the lower back stays flat. Pause, return under control, and repeat on the other side. That is one repetition. Perform 6 to 10 per side, moving at roughly three seconds out and three seconds back.
Easier and harder
To regress: move only the arms, or only the legs, and keep the other pair still. To progress: extend the leg lower and closer to the floor, slow the tempo to four seconds each way, or add a two-second pause at full reach. If your lower back arches at any point, you have already found your limit for today.
2. Forearm plank (anti-extension under load)
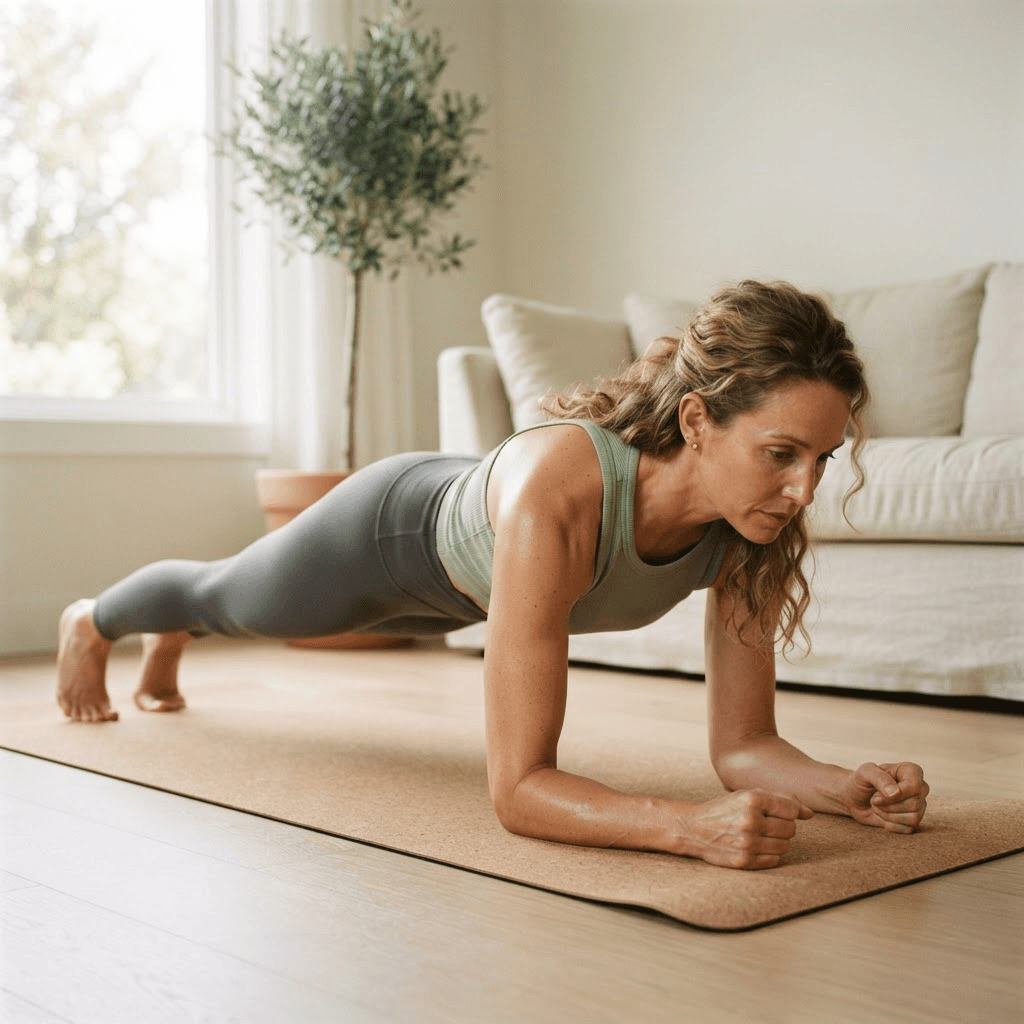
Set your elbows directly beneath your shoulders and your forearms parallel. Push the floor away so your upper back is broad rather than sunken between the shoulder blades. Tuck the tailbone very slightly so the lower back is long, squeeze the glutes gently and hold a straight line from ears to heels. Look at the floor a hand’s width in front of your fingers so your neck stays in line. Hold for 15 to 30 seconds to begin with, and stop the moment the hips sag or the breath stops.
Easier and harder
To regress: place your forearms on a sofa seat, a low table or a wall. Raising the hands reduces load enormously and is far more productive than a floor plank held with a collapsed lower back. To progress: hold longer up to about sixty seconds, then move to lifting one foot two centimetres off the floor for five seconds a side. Beyond a minute, added time gives diminishing returns; make the position harder instead.
3. Side plank from the knees (anti-lateral flexion)

Lie on your side with your knees bent to ninety degrees behind you and your elbow directly under your shoulder. Stack your hips. Lift your hips so there is a straight line from your knees through your hips to your shoulders, and rest the top hand on your hip. Hold for 15 to 30 seconds, then swap sides. This is the exercise most people are quietly worst at, and it is the one that tends to change how carrying a bag feels.
Easier and harder
To regress: perform it against a wall standing up, pressing your forearm into the wall and holding your body straight. To progress: straighten the legs into a full side plank from the feet, then eventually lift the top leg a few centimetres. Compare your two sides honestly. A twenty-second difference between left and right is common and worth narrowing before you make either side harder.
4. Bird dog (anti-rotation)

On hands and knees, place your hands under your shoulders and knees under your hips. Find a long, neutral spine. Breathe out, then slide your right arm forward and your left leg back until both are roughly parallel with the floor, without letting your hips tilt or your back arch. Hold for two to three seconds, return with control, and alternate. Perform 6 to 10 per side. If you want honest feedback, balance a phone or a small book across your lower back and keep it there.
Easier and harder
To regress: extend only the leg, keeping both hands planted, until your hips stay level reliably. To progress: hold each position for five seconds, or draw a small square with the extended hand while everything else stays still. Height is not the goal — a leg lifted above hip level almost always means the lower back has taken over.
5. Glute bridge (hip extension without back compensation)
Lie on your back, knees bent, feet flat and about hip-width apart, heels roughly a hand’s length from your bottom. Breathe out, gently brace, then push through your heels and lift your hips until your body forms a straight line from knees to shoulders. The finish comes from the glutes squeezing, not from arching the lower back to gain extra height. Pause for two seconds at the top and lower with control. Perform 10 to 15 repetitions.
Easier and harder
To regress: reduce the range and stop halfway, focusing on the glute squeeze. To progress: hold the top position for five seconds, or move to a single-leg bridge with the other knee hugged loosely toward the chest. If you feel this mostly in your hamstrings, walk your feet slightly closer to your body; if you feel it in your lower back, you are almost certainly lifting too high.
Two complete home core sessions
Run Session A and Session B on non-consecutive days — Monday and Thursday works well. Each takes twelve to eighteen minutes including the warm-up. Rest 30 to 45 seconds between exercises and about a minute between rounds. In weeks one and two, complete two rounds; the progression table below tells you when to add a third.
| Order | Session A | Session B |
|---|---|---|
| 1 | Dead bug, 6–10 per side | Bird dog, 6–10 per side |
| 2 | Forearm plank, 15–30 sec | Side plank from knees, 15–30 sec per side |
| 3 | Side plank from knees, 15–30 sec per side | Dead bug, 6–10 per side |
| 4 | Bird dog, 6–10 per side | Glute bridge, 10–15 reps |
| 5 | Glute bridge, 10–15 reps | Forearm plank, 15–30 sec |
The two sessions use the same five exercises in a different order, and that is deliberate. Whichever movement comes first is the one you perform freshest, so rotating the order stops your weakest pattern from always being trained last and worst. Beginners do not need exercise variety; they need repetition clean enough to compare week to week.
The complete 6-week core strength progression

| Week | Rounds | Hold and rep targets | Focus |
|---|---|---|---|
| 1 | 2 | 15 sec holds; 6 reps per side | Learn positions and breathe throughout |
| 2 | 2 | 20 sec holds; 8 reps per side | Repeat week 1 with steadier technique |
| 3 | 3 | 20–25 sec holds; 8 reps per side | Add the third round, keep times the same |
| 4 | 3 | 30 sec holds; 10 reps per side | Extend time only where form held |
| 5 | 3 | 30–40 sec holds; add pauses | Progress the two easiest exercises only |
| 6 | 2 early, then retest | Repeat week 1 exercises for one honest set | Measure change against your notes |
Weeks 1–2: make the positions boring
Your only job in the first fortnight is to be able to set up each exercise without thinking. Hold everything for fifteen to twenty seconds, keep reps at the lower end, and finish each session feeling like you could have done a little more. Write down the actual numbers, not your intentions. Most people are surprised in week six by how modest their week one really was.
Weeks 3–4: add volume before difficulty
Add a third round in week three but hold the times where they were. Adding rounds and adding seconds simultaneously is the most common way beginners overreach. In week four, extend hold times toward thirty seconds — but only on the exercises where your position stayed clean throughout week three. It is entirely normal to progress your plank while your side plank stays put for another fortnight.
Weeks 5–6: progress the leverage, then measure
By week five, more seconds are no longer the most efficient route. Pick the two exercises that feel easiest and make them structurally harder: straighten the legs in the side plank, lift one foot in the plank, add a five-second hold to the bird dog. Leave the other three alone. In week six, complete two moderate sessions early in the week, take two or three easy days, then repeat your exact week one exercises for one honest set each and compare the numbers.
Five ways to progress when a core exercise stops feeling hard
- Add time or repetitions inside the written range. Simplest to record and the right first choice for the first month.
- Lengthen the lever. A straighter leg in the dead bug or straight legs in the side plank increases demand sharply without adding a single second.
- Remove a point of contact. Lifting one foot in a plank or one hand in a bird dog forces the trunk to resist rotation as well as extension.
- Add a pause at the hardest position. Two to five seconds of stillness at full reach is more demanding than three faster repetitions.
- Slow the tempo. Four seconds out and four seconds back roughly doubles time under tension while keeping the exercise entirely recognisable.
Record enough that you could recreate the set exactly: exercise, position, seconds held or reps completed, and a one-word note on quality. “Side plank, knees, 22 sec left / 28 sec right, steady” is useful data. “Core day, felt hard” is not. Six weeks is long enough for memory to rewrite itself, and a notebook is the only thing that will tell you honestly whether the plan worked.
Nine common core training mistakes
- Holding your breath. If breathing stops, the exercise is too hard right now. Regress it and keep the airway busy.
- Chasing the burn. Local burning reflects metabolic fatigue in a small muscle, not the quality or transferability of the training stimulus.
- Letting the hips sag in a plank. A collapsed plank held for ninety seconds is worse practice than a straight one held for twenty.
- Pulling on the neck. If your hands are behind your head and your chin is jammed to your chest, the neck is doing work the trunk should own.
- Lifting the leg too high in a bird dog. Height above hip level almost always comes from arching the back, not from a stronger core.
- Training the core exclusively. The trunk is a link in a chain; whole-body strength work does more for it than any isolated routine.
- Adding rounds and seconds in the same week. Change one variable so you know which one worked when something improves or aches.
- Ignoring a left-right difference. Sizeable asymmetries in side plank endurance are worth closing before either side is progressed.
- Doing core work daily because it seems harmless. These muscles adapt like any other and need recovery between honest sessions.
Troubleshooting: neck, hip flexors and an aching back
You feel it mostly in your neck
In floor exercises, this usually means the head is being held up by the neck flexors rather than resting in line with the spine. Let the back of your head rest lightly on the mat or a folded towel during dead bugs. In planks, direct your gaze at the floor slightly ahead of your hands rather than looking forward. If neck symptoms persist beyond simple fatigue, or include headache, dizziness or arm symptoms, stop and get it assessed.
Your hip flexors cramp or dominate
This is the most frequent complaint with dead bugs and leg-lowering variations, and it is generally a sign that the lever is too long for your current control. Bend the moving knee more, lower the leg less far, or move only the arms for a week. Warming up with a few gentle hip flexor lunges also helps. Persistent groin or front-of-hip pain that does not settle deserves a physiotherapy opinion rather than a workaround.
Your lower back aches during or after sessions
Check three things in order. First, is the lower back staying in contact with the floor during dead bugs? Second, are you finishing the glute bridge with your glutes or with an arch? Third, are your planks longer than your position can support? Muscular fatigue in the low back after bird dogs can be normal, but sharp pain, pain that radiates into a leg or pain that is worse the following morning is a reason to stop the programme and seek assessment. If your back is the primary concern, the low-impact workouts for bad knees guide shares the same principle of building capacity below the level that provokes symptoms.
Nothing has changed after four weeks
Count your completed sessions before you change the plan. Five sessions out of an intended eight is an attendance problem, not a programming one. If attendance has been good, check whether you have actually progressed anything: many people repeat week one for a month without noticing. And if every hold has genuinely improved but you feel no different in daily life, the missing ingredient is usually whole-body strength and general activity rather than more core work.
How core work fits into your training week
| Day | Activity | Purpose |
|---|---|---|
| Monday | Core Session A, 12–18 minutes | Trunk endurance and control |
| Tuesday | Full-body strength or brisk walk | General strength and activity |
| Wednesday | Rest or gentle mobility | Recovery |
| Thursday | Core Session B, 12–18 minutes | Rotation control and single-side work |
| Friday | Full-body strength or easy cardio | General strength and activity |
| Saturday | Walk, cycle or swim at conversational pace | Cardiovascular health |
| Sunday | Rest | Prepare for the next week |
Two core sessions a week is a floor, not a ceiling you must never approach again. If you enjoy the work and recover well, a third short session is reasonable from week four onward. What is not reasonable is replacing general training with core training. Public health guidance for adults recommends regular moderate aerobic activity alongside muscle-strengthening work on at least two days a week, and fifteen minutes of planks does not satisfy either target on its own.
If you already lift, you can attach these five exercises to the end of an existing session rather than scheduling separate days. They pair particularly well with a home dumbbell routine, since the bracing skill you are practising here is exactly what a dumbbell workout plan at home demands during rows and Romanian deadlifts.
What results can you expect in six weeks?
Expect the first changes to be about coordination rather than size. In weeks one and two you get better at finding the position; the muscles have not changed much, but your ability to recruit them in the right order has. From roughly week three, endurance improvements become measurable — longer holds at the same quality, less shaking, a side plank difference that has narrowed from twenty seconds to eight. Those are real adaptations and they are the ones worth tracking.
Expect functional changes to appear in ordinary moments rather than in the gym. People typically report that standing through a long queue is less annoying, that lifting a child or a laundry basket feels more organised, or that the late-afternoon back ache has quietened. Posture often improves too, though usually because holding an upright position has become less tiring rather than because anything structural has been corrected.
Do not expect visible abdominal definition in six weeks unless your body fat is already low. That is a body composition outcome on a different timescale, driven by nutrition and total activity. Judge this programme on hold times, breath quality, left-right symmetry and how your back feels at four in the afternoon. If those four are moving, the plan is working regardless of what the mirror says.
Where to go after week six
If your numbers are still climbing, run the block again with your week six positions as the new starting point. If they have plateaued, the next step is loaded carries and standing anti-rotation work: walking the length of a hallway holding a heavy bag in one hand, or pressing a resisted handle away from your chest without letting your torso turn. Both take the endurance you have built and put it under real, everyday load, and both scale indefinitely.
A resistance band opens up most of the standing anti-rotation options without buying weights, and the resistance band workout plan for beginners shows how to anchor and progress those safely. Beyond that, the most effective long-term core training is simply good whole-body strength training performed with a braced trunk. Six weeks from now, the goal is not a longer plank. It is a body that organises itself automatically when you pick something heavy up off the floor.
References and further reading
These sources support the trunk-function, low back pain and physical-activity principles used in this guide. Links lead to the journal, professional organisation or public-health publisher.
- Core stability exercise principles and trunk muscle functionCurrent Sports Medicine Reports
- Exercise therapy for chronic low back painCochrane Database of Systematic Reviews
- Physical activity guidelines for adults aged 18 to 64World Health Organization
- Low back pain: diagnosis, treatment and prevention overviewNational Institute of Neurological Disorders and Stroke
- Progression models in resistance training for healthy adultsMedicine & Science in Sports & Exercise
Core training questions beginners ask most
How often should a beginner train their core?
Two sessions a week on non-consecutive days is an effective starting point, and it is what this six-week plan uses. Core muscles adapt and need recovery like any others, so daily planking is not automatically better. From about week four, a third short session is reasonable if you recover comfortably between workouts and your technique stays steady.
How long does it take to build core strength?
Coordination improvements often appear within one to two weeks, and measurable endurance gains — longer holds at the same quality — typically become clear from around week three. Six weeks of consistent twice-weekly training is usually enough to see a meaningful change in hold times and in how everyday lifting and standing feel.
What are the best core exercises without equipment?
The dead bug, forearm plank, side plank, bird dog and glute bridge cover every job the trunk performs: resisting extension, resisting sideways bending, resisting rotation and extending the hips without borrowing range from the lower back. All five need nothing beyond a mat and a clock, and each has a regression and a progression.
Will core exercises get rid of belly fat?
No. Spot reduction is not how the body loses fat. Core exercises build trunk endurance, control and posture, but the fat covering the abdomen responds to sustained energy balance across the whole body, shaped by diet, total daily activity and genetics. Train your core for function and treat fat loss as a separate goal with its own methods.
Are planks safe if I have lower back pain?
Many people with non-specific low back pain tolerate planks well, particularly elevated versions with the forearms on a sofa or table, because they train the trunk without repeated bending. That said, back pain has many causes. If your pain is new, severe, worsening, radiating into a leg or accompanied by numbness or changes in bladder or bowel control, get assessed before starting any core programme.
Why do I feel core exercises in my hip flexors instead of my abs?
Usually because the lever is longer than your current control allows, so the hip flexors take over from the abdominal wall. Bend the moving knee more, lower the leg a shorter distance, or move only your arms for a week or two. Rebuild the range gradually once your lower back can stay flat against the floor throughout.
Do I need to hold a plank for several minutes?
No. Beyond roughly sixty seconds, additional time offers diminishing returns and mostly tests patience. A better progression is to make the position harder — lift one foot briefly, elevate the feet, or add a controlled reach — while keeping holds in the twenty to sixty second range with your position and breathing intact.
Can I do this core workout while pregnant or postpartum?
Speak with your maternity care provider or a pelvic health physiotherapist first. Pregnancy and the postpartum period change abdominal wall loading, and some exercises here may need modification or substitution, particularly if you have diastasis recti or pelvic floor symptoms. Individual guidance is genuinely worth it rather than a general plan written for a general audience.
Vitality Editorial Team
Vitality publishes practical fitness guidance based on cited sources and established public-health recommendations.
Medical disclaimer: This article is educational and general in nature. It is not a diagnosis, prescription or personalised training plan. Speak with a qualified healthcare professional before starting a new exercise programme, particularly if you have an existing condition, injury or are pregnant.