Jump Rope Workout for Beginners: A 6-Week Plan to Build Cardio and Coordination
A six-week jump rope workout for beginners that starts with 20-second intervals, builds to real conditioning, and fixes the timing, rope length and landing mistakes that make most people quit in the first week.
Key takeaways
- A jump rope is the cheapest genuine conditioning tool you can own, and thirty focused seconds of it raises your heart rate faster than most gym cardio machines.
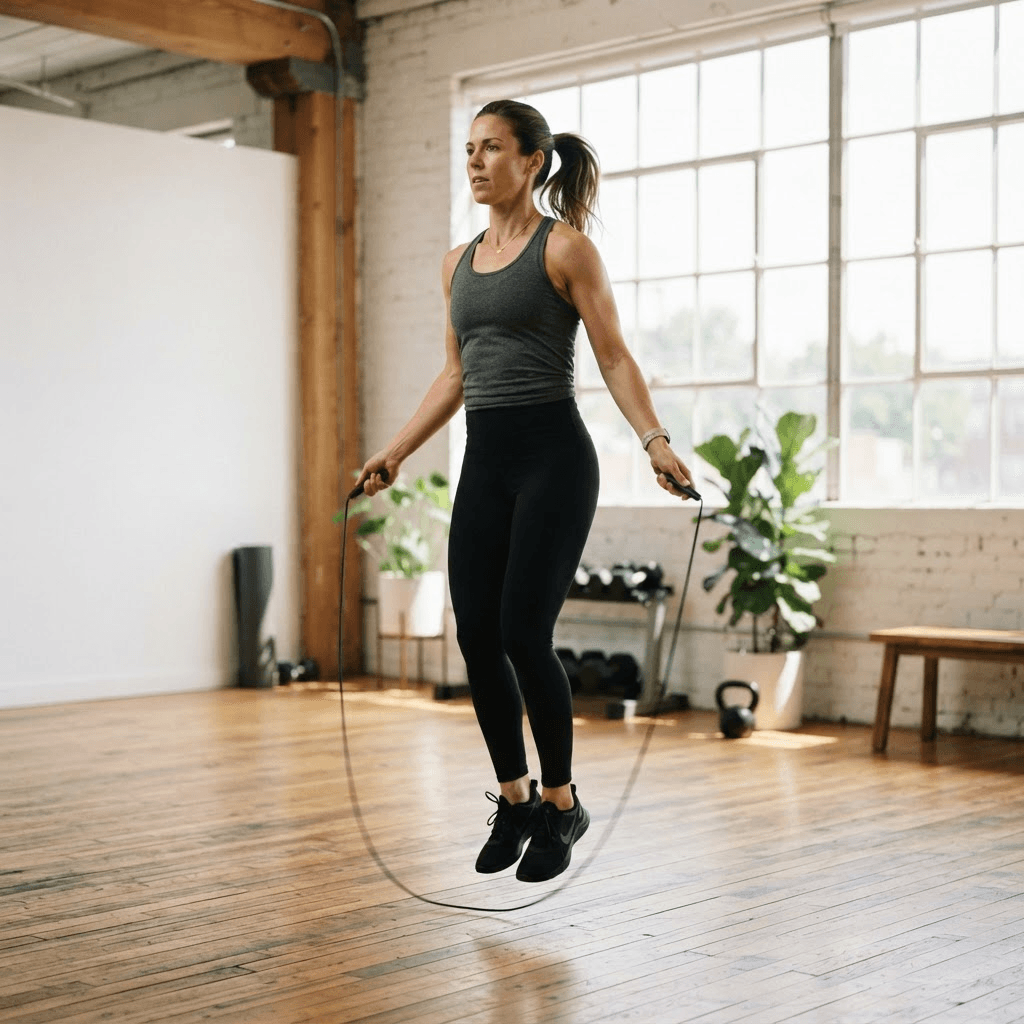
- The single biggest beginner error is jumping too high. You need one to two centimetres of clearance, not a hurdle.
- Work in short intervals from day one — 20 to 30 seconds on, 40 to 60 seconds off — rather than trying to skip continuously.
- Rope length decides everything. Stand on the middle of the rope and the handles should reach roughly your armpits.
- The turn comes from small wrist circles, not from swinging your whole arms. If your shoulders are tired, your technique is doing the work your wrists should.
- Progress by adding rounds and shortening rest before you add speed. Coordination is a skill, and skills are built by frequency, not by exhaustion.
- Land quietly through the balls of the feet with soft knees; a quiet rope and quiet feet are the two best signs your form is right.
A jump rope is the most portable serious cardio tool that exists. It costs less than a single month of a gym membership, folds into a jacket pocket, and asks for about a square metre of floor. It is also the piece of kit people abandon fastest, and almost always for the same three reasons: the rope is the wrong length, they jump far too high, and they try to skip for two unbroken minutes on day one and conclude they are simply "not coordinated". None of those are fitness problems. They are setup and pacing problems, and this guide fixes all three before you take a single jump.
Why a jump rope is such efficient conditioning
Skipping is a full-body, rhythmic, weight-bearing activity that drives your heart rate up quickly because it recruits your calves, quads, glutes and shoulders at once while demanding constant balance and timing. That combination is why boxers have used it for a century: it builds aerobic capacity, foot speed and coordination in the same few minutes, with almost no equipment and no travel time.
The often-quoted claim that ten minutes of skipping equals thirty minutes of running is an oversimplification, but it points at something real. Minute for minute, moderate skipping sits at a high metabolic cost — comparable to a steady run — while also loading your bones and improving the reactive stiffness of your lower legs. What matters for a beginner is not the exact calorie figure but the ratio of stimulus to time: you can get a genuine conditioning effect from a rope in the ten or fifteen minutes most people can actually find on a weekday.
- Cardiovascular fitness — sustained skipping trains the same aerobic system as running or cycling, and interval skipping trains the anaerobic side too.
- Coordination and rhythm — timing the turn to the jump is a skill that transfers to almost every other sport and improves surprisingly fast with daily practice.
- Bone and tendon health — controlled impact signals your bones to maintain density and stiffens the tendons of the lower leg, which protects the ankle and knee over time.
- Foot and ankle strength — the small stabilising muscles of the foot work hard on every landing, which many adults never otherwise train.
- Cost and convenience — it works in a garage, a hotel room or a car park, and a decent rope costs very little.
None of this makes it a replacement for strength training, and it should not try to be. Skipping and lifting train different qualities, and a good week usually contains both. If you are building the rest of your training around this, our guide to strength training for beginners covers the resistance side without either one interfering with the other.
Choosing a rope and sizing it correctly
You do not need a weighted rope, a speed rope or a beaded rope to begin. You need a rope that is the right length, because length is the difference between a rope that turns cleanly under your feet and one that whips your shins or catches on the floor behind you. Most ropes sold today are adjustable, which is exactly what you want while you learn.
The armpit test
- Stand on the middle of the rope with one foot, feet together.
- Pull both handles straight up alongside your body with the rope taut.
- The tops of the handles should reach somewhere between your lower chest and your armpits.
- If the handles rise well above your shoulders, the rope is too long — shorten it. If they barely reach your belly button, it is too short.
A slightly longer rope is more forgiving while you learn, so if you are between settings, err long. As your timing improves you can shorten it a couple of centimetres, which speeds the turn up and makes fast work easier. A rope that is too short is the single most common cause of the endless tripping that makes beginners give up.
Where to jump
Surface matters more than most people expect. The best surfaces for beginners are wood, rubber gym flooring, or a firm interlocking foam mat — they give a little without being soft. Avoid concrete where you can, because it is unforgiving on the joints, and avoid thick, spongy carpet, which absorbs the rope and forces you to jump higher to clear it. You also need enough overhead clearance to swing the rope without catching a light fitting, which rules out a surprising number of living rooms.
The basic bounce, step by step
Every jump rope skill is a variation on one move: the basic two-foot bounce. Get this genuinely comfortable before you touch anything fancier, because the fault patterns you build now are the ones you will spend months undoing later.
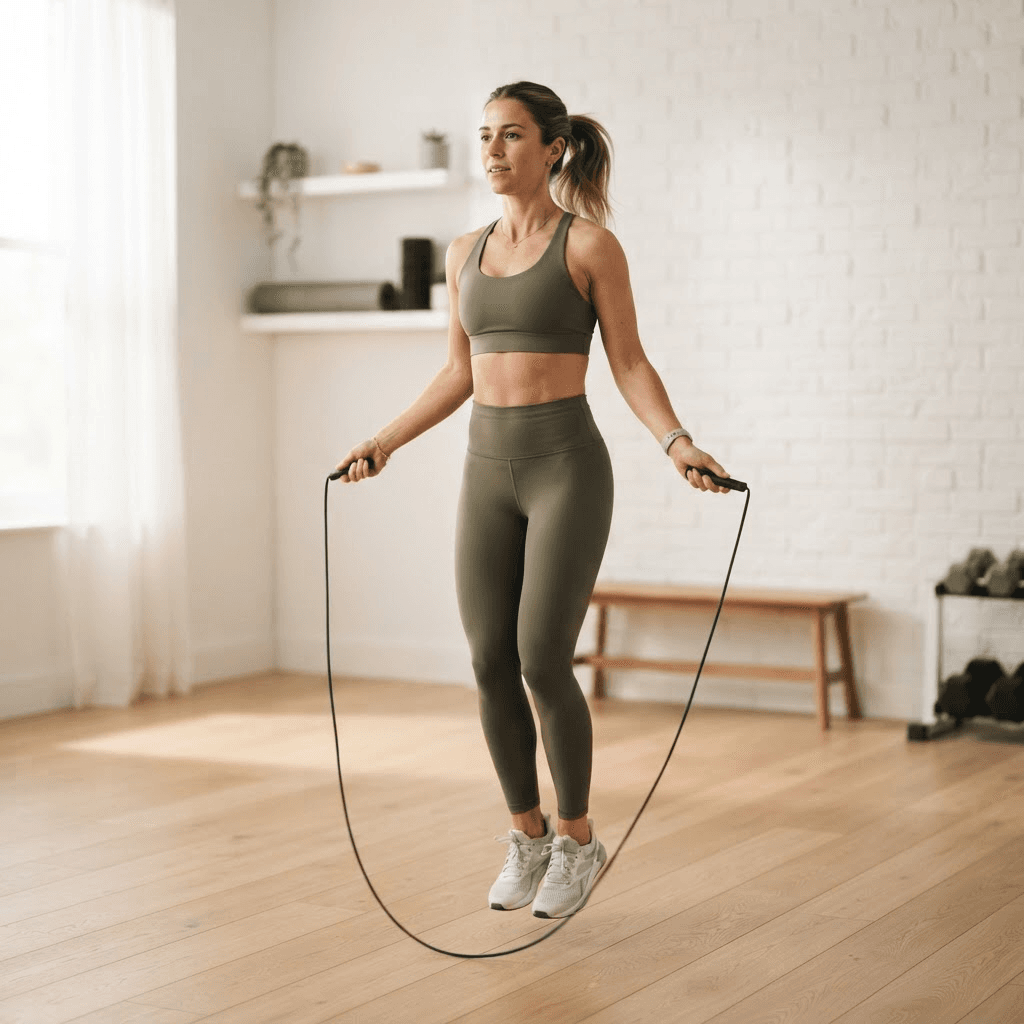
- Hold the handles with a relaxed grip, elbows tucked close to your ribs and hands roughly at hip height, a little in front of and out to the sides of your body.
- Keep your upper arms almost still. The rope is turned by small circles of the wrists and forearms, not by swinging your shoulders.
- Start with the rope behind your heels. Turn it up and over, and as it comes down towards your toes, hop just high enough to clear it — one to two centimetres is plenty.
- Land softly on the balls of your feet with your knees slightly bent, letting your ankles and calves absorb the contact quietly.
- Keep your torso tall, your gaze forward at a fixed point, and breathe in a steady rhythm rather than holding your breath.
Learn the pieces separately if the timing will not come
If the whole movement feels impossible, break it in two. First, practise the jump with no rope at all: small, quiet, rhythmic hops on the balls of your feet, thirty seconds at a time, until the bounce feels metronomic. Separately, hold both handles in one hand and turn the rope beside your body so it slaps the floor in a steady rhythm, matching that sound to your hop. Then put them together. Splitting the skill like this is how coaches teach children, and it works just as well for self-conscious adults.
The error behind almost every trip
When beginners keep catching the rope, the cause is nearly always jumping too high and too slowly, which leaves the feet on the floor when the rope arrives. Counterintuitively, the fix is usually to jump lower and turn the rope a touch faster, not slower. A low, quick, relaxed bounce is far easier to time than a big, tense, hang-time leap.
The six-week beginner plan
This plan is built on intervals from the very first session, because continuous skipping is a poor way to learn and a fast way to wreck your calves. You will work in short bursts with generous rest, and you will progress by adding rounds and trimming rest long before you try to go faster. Aim for three to four sessions a week on non-consecutive days at first, so your lower legs have time to adapt to the impact.
Always start each session with two or three minutes of easy movement — marching on the spot, ankle circles and calf raises — and finish with a gentle calf and shin stretch. During the "on" intervals, the goal in the early weeks is clean, unbroken skipping, not speed; if you trip, reset calmly and carry on. The rest periods are active: keep walking or lightly bouncing rather than standing still.
| Weeks | Sessions / week | Work interval | Structure | Target effort |
|---|---|---|---|---|
| 1 | 3 | 20s on / 40s off | 6 rounds, roughly 6 minutes total | RPE 5–6 — learning the timing, not chasing fatigue |
| 2 | 3 | 30s on / 45s off | 8 rounds, roughly 10 minutes total | RPE 6 — aim for unbroken intervals |
| 3 | 3–4 | 40s on / 40s off | 8 rounds, roughly 11 minutes total | RPE 6–7 — steady rhythm, controlled breathing |
| 4 | 4 | 45s on / 30s off | 10 rounds, roughly 13 minutes total | RPE 7 — the rest starts to feel short on purpose |
| 5 | 4 | 60s on / 30s off | 10 rounds, roughly 15 minutes total | RPE 7–8 — introduce one variation per session |
| 6 | 4 | 60–90s on / 30s off | 10 rounds, mix steady and faster bursts | RPE 8 on the final rounds only |
By the end of week six you should be able to skip for a minute or more at a time, string together ten to fifteen minutes of interval work, and hold a basic bounce without thinking about it. That is a genuine conditioning base, and it is the point where adding variations — the boxer step, high knees, single-leg work — becomes fun rather than frustrating.
What RPE means here
Rating of perceived exertion is simply how hard the effort feels on a scale of one to ten, where three is a stroll and ten is an all-out sprint you could not hold for another five seconds. RPE 6 to 7 is "working, breathing hard, but could still say a short sentence". Using effort rather than a fixed number of jumps means the plan self-corrects on days you slept badly, and it stops you turning a skill session into a survival test.
How to make it harder — in the right order
Progression on a rope is not mainly about jumping faster. Speed is the last lever you pull, not the first. Change one variable at a time so you always know what made a session harder:
- Add rounds. Going from six to eight to ten rounds increases total work without changing the effort of any single interval.
- Shorten the rest. Trimming rest from 45 to 30 seconds raises the cardiovascular demand while keeping the skipping itself familiar.
- Lengthen the work interval. Move from 20 to 30 to 45 to 60 seconds only once the shorter intervals feel clean and unbroken.
- Add a variation. The boxer step (a small side-to-side shift of weight), alternating feet, or high knees all raise the challenge and keep it interesting.
- Add speed. Turning the rope faster with quicker, lower bounces is the final progression and the one most likely to reintroduce tripping, so save it for last.
Resist changing three things in the same week. If you add rounds, cut rest and speed up all at once and the session falls apart, you have learned nothing about which change was too much. The dull discipline of one variable at a time is exactly what turns a six-week experiment into a habit that lasts.
The mistakes that make beginners quit
- Jumping too high. Hang time is the enemy of timing. Aim to barely clear the rope; a loud, heavy landing means you are launching yourself where a small hop would do.
- Swinging from the shoulders. If your traps and shoulders are burning before your calves are, your arms are doing the wrist's job. Tuck the elbows and make small circles.
- A rope that is the wrong length. Too short and you trip constantly; too long and it drags. Re-run the armpit test before you blame yourself.
- Skipping every day from the start. Your calves and shins need adaptation time. Three or four sessions a week early on prevents the shin soreness that ends most beginners' first fortnight.
- Going for unbroken minutes on day one. Continuous skipping is a milestone, not a starting point. Intervals build the skill and protect the joints at the same time.
- Holding your breath. Beginners tense up and forget to breathe, which spikes perceived effort. Match a steady breathing rhythm to the bounce.
- Practising on concrete. Hard surfaces multiply the impact through your ankles, shins and knees. Find wood, rubber or a firm mat wherever you can.
Impact, your knees, and recovering well
The most common worry about skipping is that it is bad for the knees. Done sensibly, the opposite is closer to the truth: controlled, progressive impact is one of the things that keeps tendons and bones robust, and a proper basic bounce actually produces less peak force at the knee than running does, because the landings are shallow and spread across both feet. The trouble comes from doing too much too soon on a hard floor with a heel-first landing.
Protect yourself the boring way: supportive shoes with some cushioning, a forgiving surface, a slow build in volume, and honest attention to the difference between muscle soreness and joint pain. Aching calves for a day or two after a new session are normal and expected. Sharp or pinpoint pain in a joint, shin pain that worsens session on session, or any pain that changes how you walk is not — that is a signal to stop and, if it persists, to get it looked at. If your knees already object to impact, our guide to low impact workouts for bad knees is a better place to start.
When to take an easier week
If two sessions in a row feel harder than the plan says they should, your shins are tender, and your enthusiasm has drained away, drop back a week in the table and keep the effort easy for a few days. Almost everyone comes back sharper. Pushing through that state is precisely how a promising six-week plan becomes an abandoned two-week one.
The secret to a jump rope, in the end, is unglamorous and completely reliable. Get the length right, keep the bounce low, turn the rope with your wrists, work in short intervals, and add a little more than last week. Do that three or four times a week for six weeks and the thing that felt like a coordination test on day one becomes ten quiet minutes of the best-value cardio you own.
Evidence and further reading
These sources underpin the cardiovascular, impact, bone-health and safety guidance used in this article. All are freely accessible summaries or peer-reviewed research.
- Physical Activity Guidelines for Americans, second edition — aerobic and bone-strengthening recommendationsU.S. Department of Health and Human Services
- WHO guidelines on physical activity and sedentary behaviourWorld Health Organization
- Effects of rope skipping on health-related physical fitness: a systematic review and meta-analysisBMC Public Health
- Compendium of Physical Activities — metabolic cost (MET) values for rope jumpingMedicine & Science in Sports & Exercise
- Weight-bearing exercise and the maintenance of bone mineral densityBritish Journal of Sports Medicine
- ACSM Guidelines for Exercise Testing and Prescription, 11th editionAmerican College of Sports Medicine
Common jump rope questions beginners ask
How long should a beginner jump rope for?
Start with short intervals rather than a single block of time — roughly 20 to 30 seconds of skipping followed by 40 to 60 seconds of rest, repeated six to eight times. That adds up to only a few minutes of actual jumping in the first weeks, which is exactly right. Continuous skipping for a minute or more is a milestone you build towards over about six weeks, not a starting point.
Is jumping rope bad for your knees?
Done well, no — controlled skipping produces relatively low peak force at the knee because the landings are shallow and spread across both feet, and progressive impact actually helps keep bones and tendons strong. Problems come from doing too much too soon, landing heavily on the heels, or jumping on concrete. Use a forgiving surface, cushioned shoes, a low soft bounce and a slow build in volume, and stop if you feel sharp or worsening joint pain.
What size jump rope do I need?
Stand on the middle of the rope with one foot and pull the handles straight up: the tops should reach somewhere between your lower chest and your armpits. If they rise well above your shoulders the rope is too long; if they barely clear your belly button it is too short. When in doubt, err slightly long while you learn, then shorten it a little as your timing improves.
Why do I keep tripping on the rope?
Almost always because you are jumping too high and too slowly, so your feet are still on the floor when the rope comes round, or because the rope is too short. Counterintuitively, the fix is usually to jump lower and turn the rope a touch faster with your wrists, and to re-check the length. Practising the hop with no rope and turning the rope beside you with both handles in one hand also helps the timing click.
Is jumping rope good for weight loss?
It can be, because minute for minute it burns energy at a rate comparable to running, and it is easy to do consistently since it needs almost no equipment or travel. That said, no single exercise drives weight loss on its own — the overall pattern of movement, food and sleep matters far more. Rope work is best used as efficient conditioning within that bigger picture rather than as a standalone fix.
How many days a week should I jump rope?
Three to four sessions a week on non-consecutive days is ideal for beginners. That gives your calves and shins time to adapt to the impact, which is what prevents the shin soreness that ends most people's first two weeks. Once you have a base of six weeks or so, you can skip more often if you want, ideally alternating harder and easier days.
Do I need a weighted or speed rope to start?
No. A plain adjustable rope is the best choice while you learn, because length is what matters most and adjustability lets you dial it in. Speed ropes turn very fast and punish timing errors, while weighted ropes add shoulder and forearm fatigue you do not need yet. Master the basic bounce with a simple rope first, then experiment later if you want a different feel.
What is the best surface to jump rope on?
Wood, rubber gym flooring or a firm interlocking foam mat are ideal — they give a little without being soft. Avoid concrete, which is hard on the joints, and thick spongy carpet, which absorbs the rope and forces you to jump higher. You also need enough overhead clearance to swing the rope freely, which many indoor spaces lack, so check the ceiling before you start.
Vitality Editorial Team
Vitality publishes practical fitness guidance based on cited sources and established public-health recommendations.
Medical disclaimer: This article is educational and general in nature. It is not a diagnosis, prescription or personalised training plan. Speak with a qualified healthcare professional before starting a new exercise programme, particularly if you have an existing condition, injury or are pregnant.